Monday, December 5, 2011

Leftover Turkey Enchiladas

I'm not a big fan of turkey period. However, I am also not a big fan of throwing food away. Since we hosted T-give this year, and the only happy turkeys were ginormous, it is imperative that we find something edible to do with the remains. Here is one option - a slightly revised version of " The Fannie Farmer Cookbook" recipe. I suppose you really can't go wrong if you smother something in cheese. 


I would also like to note that, while I do not usually go in for canned things, it's not tomatillo season down here, so I went with canned. I also happened to have a can of peeled green chilies that I've moved at least twice now, and since the original recipe calls for just that, it seemed like a good time to use it. Finally, leftovers and canned goods. Right?


Enchiladas with Turkey and Green Sauce


1/8 - 1/4 c. peanut oil (approx.)

8 flour tortillas

2 c. shredded, cooked turkey

1/3 lb Monterey Jack cheese, grated

1/3 lb sharp cheddar cheese, grated

1/4 c. heavy cream

1/4-1/2 c. finely chopped scallions

Salt

1 15oz. can crushed tomatillos, drained

1/2 c. chopped cilantro

1 4oz. can peeled green chilies, drained and chopped

1/2 tsp. ground cumin

optional: fresh chilies, finely chopped, to taste

(serves four)


one: Preheat the oven to 375. Oil a baking dish about 13 x 9 x 2 in.


two: In a small bowl, combine tomatillos, cilantro, chilies (canned and fresh, if using), cumin and salt to taste. Set aside.

three: Heat about 1/2 tbsp oil in a skillet. Put each tortilla into the hot oil for a few seconds, turning it over as it softens. Add more oil as needed. Stack the tortillas in a pan.

four: Put some turkey, cheese, 1 tbsp cream, sprinkling of scallions and salt to taste down the center of each tortilla. Roll them loosely and place them in the baking dish - it will be a tight fit.

five: Cover the baking dish with tinfoil and bake for 20 min. At this point, take the dish from the oven, uncover and spread the sauce evenly over the top of the enchiladas. Recover and bake for another 10 - 15 min - until the cheese melts and begins to bubble.

enjoy!

note: you may need to adjust the cumin, as I eyeballed this one when I was making it. 

Monday, June 20, 2011

Summer Time and The Eating Is

Nearly Impossible.

It is nearly impossible to eat in the summer in the south. It’s just

too

fucking

hot.

Even my cat has stopped devouring her half-scoop and the cat food goes stale in the bowl.

Which makes summer in the south an especially specialty challenge. Which for me revolves around tomatoes, cucumbers, basil and rice. Eggplants, okra, mint and peaches. The blender – smoothies, cold soups, daiquiris – and the bowl. Fresh sauces sit rather than simmer. And always

always

a little bit of fried.

Saturday, January 29, 2011

Asian Beet Relish


This is my vegan version of a recipe out of my favorite noodle book. It's all Asian inspired, Asian-styled, and I have yet to make a recipe out of it that came out bunk. I happen to love beets - the flavor and the color is really excellent during the grey winter months - but there aren't a ton of beet recipes out there. This one is super easy and quick - once you've cooked the beets, that is.


Asian Beet Relish (w Noodles)

Pre-cooking: don’t forget you have to give these beets lots of time to cook. There are various ways to do it, but I’m onboard with the method in the book: pre-heat the oven to 300 and trim greens if there are any. Place beets on a baking sheet or a sturdy piece of tinfoil or a piece of tinfoil on a baking sheet. Bake for about 1-2 hrs for small beets and 3+ hrs for larger beets. Beware: it’s not unlikely you’ll need the upper amount of time – or longer. You can check the beets by poking with a fork – if the tines slide in easily, then the beets are done. You can let them cool completely or run them under cold water. Either way, the skins should peel off easily. I cut off the tops and bottoms, and peel the skin off in strips from top to bottom with the edge of a pairing knife.


1 lb. beets, cooked and skinned

2 shallots, finely chopped

1 clove garlic, crushed or finely chopped

1 tsp ginger, grated or finely chopped

2-6 chilies, finely chopped

½ c parsley, chopped

3 tsp white wine vinegar or Japanese brown rice vinegar

1-2 tbsp olive oil

2 tsp brown sugar

2-3 tbsp nutritional yeast

2-3 tbsp Bragg's or soy sauce

serves a

bout 4

one: chop beets and place in a medium-sized mixing bowl - preferably glass or metal. Something that won't stain the way your fingers stain.

two: mix nutritional yeast and Bragg’s to make a thin paste. Add all of the remaining ingredie

nts – including your paste – to the bowl and combine.

three: taste for spice and salt. Add more chilies or Bragg’s if low in these, add more parsley if high. Of

course, it’s easier to add more salt and spice than to subtract it, so start on the conservative side and work up.

four: top noodles with beet relish or ‘dip’ your noodles in the relish as you eat.


My favorite are the thick Japanese udan noodles, but feel free to try another variety. This relish would aslo be great with chicken or pork, and could easily be added to other dishes to pick them up – or as a side to cut through heavier entrees.

The recipe originally calls for anchovies (4-6 oz). I’ve tried it this way, but I just don’t like anchovies. I mean really. Anchovies? So I’ve sub-ed in the nutritional yeast and Bragg’s. If you’re not vegan and you’re opposed to veganizing, feel free to chop up some anchovies and take it back to its roots. I salute you.


Saturday, January 15, 2011

Veggie Broth: The Trash Factor

I like to keep broth in the house – usually in the freezer – so if I want to make soup or curry on a whim I don’t have to resort to water. Naturally, certain soups do better with certain broths, but veggie broth is pretty innocuous in a pinch. Especially if you’re making a recipe that says you can use water instead. Or if you’re, say, making a lentil soup that only calls for water. Substituting broth – or some broth – adds a little extra body to the soup.

The best thing about broth is that it can be a great way to clean out your fridge. You can, of course, buy all of your broth ingredients, follow a strict recipe, cut them up fresh, etc, etc, blah, blah.

Ooor

you can cobble together a broth out of whatever is about to go bad in your fridge. This is particularly useful for those of us who live alone and don’t always make it through our produce in time. And for those of us who hate throwing anything away, even the stems. Veggies in frozen broth form keep just about forever.

Below is the recipe for the broth I made today, with some suggestions for mixing and matching below:

Asian-Inspired Veggie Broth

1 onion, chopped

1 jalapeño, chopped

2 oz.-ish, sliced mushrooms

1 bunch cilantro stems

½-1 tbsp galangal*

1 stem lemongrass

Salt

one: Heat some olive oil on med-high in the bottom of a large pot. When hot, add onions and cook for a minute. When fragrant, add jalapeño, mushrooms and cilantro stems and cook for another few minutes, stirring occasionally.

two: Add 8+ cups of water plus remaining ingredients. Bring to a boil and simmer, partially covered, for about 45 min – 1 hr.

three: Strain broth into a large bowl to cool. Press veggies to get all of the liquid out and dispose. When the broth has cooled, portion out to your liking and freeze, or use immediately.

makes about 6 cups.

I don’t usually put mushrooms in my lemongrass broth, but I had some that weren’t looking too hot, so I decided to throw them in rather than toss them. Aside from that, this is one of my standards. Feel free to take out the jalapeño if spicy isn’t your style.

etc: Some other things that can go in broth?

Carrots (add sweetness)

Potatoes (hardy)

Celery (mild)

Lettuce leaves (mild)

Parsley (leaves and/or stems)

Shallots (onion+)

Garlic

Ginger

Any other chilies you like

Tomato paste

Miso (any variety – red goes nicely with mushrooms)


Feel free to play around with amounts. The trash can broth process may not produce a broth you want to sip alone every time, but I’ve never made a veggie broth that ended up too strong, too bitter, too offensive to put into something else. It seems relatively foolproof, as long as you’ve got a handle on the amount of salt you toss in. And you can always add more water.

I would avoid the brassicas – broccoli, cabbage, brussel sprouts, etc. – because they tend to have a bit of a sulfury smell. But basically anything goes. Think about matching colors – bright greens make a brighter tasting broth, earth tones make an earthy broth, mix and you get a layered broth, etc, etc, blah, blah.

Also, I really like to freeze this in known amounts, so I don’t have to remeasure after it’s defrosted. Instead, I can just defrost the amount I know I need. Usually, I freeze it in 2 or 4 cup amounts. Since I never throw anything out, I have several preferred containers. Large yogurt containers are perfect for 4 cups, and those medium-sized clear deli containers that things like olives, feta cheese, etc come in are perfect for 2 cups. Containers like yogurt containers tell you how much they hold, more or less, or you can pour the stock into a measuring cup and from there to your choosen container.

*galangal is used in Asian cooking. It’s a root in the ginger family with something of a ginger flavor, but it’s more of a bitter/sour and less of a hot/spicy. I happen to have some in a jar – prolly purchased at Whole Foods – on hand because I have a particular cook book devoted to noodle dishes that often calls for it. It’s not necessary. You could consider substituting ginger, but beware of the extra zing.

Monday, January 10, 2011

Kitchen Widgets part I


Along with liking good food, I like good things. Too many good things. So many good things that I don't always have a use for them. In particular, I have a lot of kitchen widgets – a pretty absurd amount for a person who doesn’t even have a job that supplies health insurance – partly because my mother and grandmother list toward cooking paraphernalia in their gift-giving, and partly because I am obsessed with estate-sales and the vintage aesthetic. Back then – and by back then I mean rough the 30s thru the 70s – appliances had style. Appliances, clothing, cars, tchotchkes, whathaveyou. They had style and class and sex appeal. Even things like blenders and ice-cream scoops were sexy back then. Sexy and solid. They're still hanging around if you look in the right places.

In any case, I often fall in love with the aesthetic of something rather than it's function. Sometimes I'm good at resisting, but sometimes I'm not. I have clothing I own simply because it's so fabulous I had to own it, and this phenomenon is not limited to my closet.

In this instance, I acquired a teeny tiny pot at an estate sale about a year ago. I bought it because it was an amazing orange color, because it is enamel, which I love, and because it's a teeny tiny pot on the end of an abnormally long handle. I figured I could use it to melt butter – for pancakes? to go in crepe batter? And it was small enough that, as far as useless kitchen items go, it wasn’t very offensive.

I am writing this because perhaps you have something like this, and I recently discovered an excellent use for my teeny tiny pot. Seeing as how I have no microwave.

Unlike some people out there, I like my coffee best while it’s still actually hot. For a long time I was drinking it black – which began as a sort of self-imposed food challenge and evolved into a taste – but recently I’ve begun putting cream in it occasionally to help out my stomach. This is particularly fun during the holiday season when the stores all stock eggnog. The problem with cream and eggnog is that it’s cold, and it cools down the coffee. The solution to the problem is my tiny pot!

Because it’s so small - as opposed to say the small-size sauce pan I have, which was previously my only option for heating smaller amounts of things - less of the liquid is in direct contact with the hot surface and so it heats more slowly. Thus it is less likely to scald when you look away for a second - something I am always doing because there is always something to do in the kitchen, and I hate waiting for the pot to boil, as it were. The tiny pot also has the perfect little pour spout, and because this is its only use, heating cream in it doesn’t disturb the rest of my cooking schedule by dirtying something I need elsewhere.

So if you are also against microwaves and like your coffee to stay as hot as possible, wha-la! Tiny pot!


It is, of course, also good for melting butter. What else do you use your tiny pot for?

Platanos


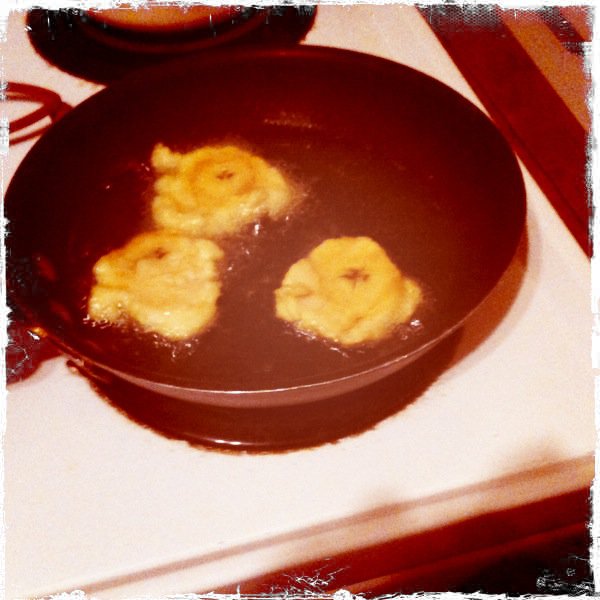
I have no cultural connection to plantains; the first time I encountered them was in my mother’s kitchen in up-state New York. And I’ve really never had them better than hers – except, perhaps, until I started making them myself. I’ve adopted my mother’s double-fry method so the plantains come out more like chips than slices of banana-ness, however I do like the sweetness of the riper plantain, while my mother tends to use green ones. They’re good both ways – it just depends on if you’re in the mood for something starchy/salty or something fruity/salty.


Fried Plantains

1 plantain

Oil for frying (canola, veggie, corn, etc.)

Salt or Tony’s to taste

A large plate lined with a few layers of paper towel.


one: Heat about ¼ in. of oil in a frying pan over medium-high heat until hot. While it heats, peel the plantain and cut into about 1 ½ in. lengths.

two: Place plantain pieces one cut side down in the oil. (Leave plenty of room around them, because you’re going to mash them into flatter, wider discs. You may have to do the plantain in a couple of batches, depending on the size of your frying pan.) When the bottom of the pieces is very lightly golden – this goes quickly, certainly no more than a minute – flip to the other cut side and fry until lightly golden.

three: Remove lightly cooked pieces to a flat, contained surface like a cutting board. Place one cut side down and flatten by pressing down with a flat, slick object. I like to use the bottom of a glass. Once you have flattened the plantain to about ¼ in. thickness, return to the pan and fry – first on one side, then the other – until it's a deep golden, browning on the edges.

four: Remove to a paper towel-lined plate to drain. Sprinkle with salt or Tony’s, allow a minute or so to cool if you’re not still frying, and enjoy!


I have a slotted, metal spatula that works great for moving the plantains around during cooking. They also tend to stick to the bottom of the glass. I simply move the glass, with mooshed plantain on the bottom, above the oil and scrape the plantain off with the metal spatula.

Tuesday, January 4, 2011

Coconut Curry Tofu Stew

I’ve been on a bit of a rice kick recently, because it’s so cheap and it's also an easy way to bulk out a lot of flavors. Here’s a less rice-centric, rice friendly, vegan option, good for spicing up those cold winter days.

This is surely a recipe from somewhere legit, but it came to me on a lineless index card so I’m going to pass it on without compunction. I’m pretty sure my mom offered this up one time – back in my stricter veggie days – as a quaintly classic (i.e. includes both tofu and ethnic-ness) vegetarian option. My mother is generally non-veggie, but she tries for me. I just found this particular recipe among my stash of recipes-from-home, which get sent on index cards and stored in a too-small envelope among my cook books. I couldn’t actually remember how it came out, but I figured it must have been alright if I requested indexing it. It’s been cold down here, too, and curry stew sounded appropriate. Also the length of cook time was appealing (about 20 min tops). Turns out – it’s great! Nothing earth changing, but a really solid curry with the utmost ease.

Coconut Curry Tofu Stew

2 bunches scallions

1 14 oz can (light) coconut milk

3-4 tbsp soy sauce/Bragg’s

½ tsp brown sugar

1 ½ tsp curry powder

1 tsp minced fresh ginger

1-2 tsp chili paste with garlic

1 lb extra firm tofu (or one nearly lb package), cut into bite-sized cubes

4 ripe plumb tomatoes, coarsely chopped

1 yellow or red bell pepper, thinly sliced

¼ lb mushrooms, stemmed and sliced

4 cups coarsely chopped bok choy or spinach


one: Cut scallion whites and about 2 in of green diagonally into slices. Set aside.

two: Combine coconut milk with the next 5 ingredients in a large pot or pan. Bering to a boil over medium heat. Add tofu, tomatoes, peppers and mushrooms. Cover and cook 5 min. Add greens, cover and cook, stirring occasionally, another 5 min or until veggies are cooked to your liking.

three: Serve, garnished with scallions, over rice or noodles.


A few notes:

The recipe apparently calls for light coconut milk but I went right ahead and used the regular, and it is, of course, fine. Prolly tastes better – just makes you fatter.

I used the bigger amount of all of the range ingredients – and I did half soy sauce and half Bragg’s.

I couldn’t find any scallions at the grocery, so I used two medium sized leeks and put them in with the other veggies at the beginning. This was good.

Lastly, this is awesome over rice, especially because it is fairly liquid-y, and the rice soaks it up, but I’m sure it would be equally awesome over buckwheat or regular soba noodles. Let me know.

Sunday, December 26, 2010

Linzer Lattice Cookies


We always made several kinds of Xmas cookies every year when I was a child. For some reason, they all seemed to be labor intensive - lots of rolling out and shaping and squeezing of things through tubes or decorating with various sprinkles. Maybe that's part of why I haven't had these particular cookies in years. I realize there are plenty of less demanding linzer cookie recipes out there, but these were always my favorite growing up, and there's something about the process of rolling out and cutting the dough over and over. It's like cookie meditation. Not to mention you feel like you've really earned those cookies by the time they're all done.


Linzer Lattice Cookies

(I asked my mother to send me this recipe about a month ago, and apparently all she had were the ingredients and bake time written down on a scrap of paper. I copied that out of the email she sent me word for word - the directions I had to recreate from memory.)

1 c butter

1 c sugar

2 egg yolks

1 tsp lemon zest

2 c flour

2/3 tsp cinnamon (odd, isn’t it?)

½ tsp cloves (or nutmeg - oh, I lied. This is my addition. I never have cloves in the house, but I always have nutmeg.)

1 c ground almonds

10-12 oz. jar raspberry jam

one: In a medium mixing bowl, combine flour, cinnamon, cloves, lemon zest, almonds and a pinch of salt. In another (larger) mixing bowl, cream butter and sugar. When uniform, add egg yolks one at a time and continue to beat until smooth.

two: Stir dry ingredients into wet until all combined. You will have a very thick, heavy dough. Wrap in plastic wrap and chill for 1 hr.

three: Preheat the oven to 350. Cut dough approximately in half. Roll each half of the dough out between two large pieces of wax paper. I should be as uniform in thickness as possible – and should be no more than about an 1/8 of an inch thick. Place half of the rolled-out dough in the freezer.

four: Remove top wax paper from remaining half of the dough and trim edges with a pizza cutter or sharp knife so that you have a rectangle. Save the scraps in a pile on your wax paper. Spread about ½ the jar of jam over the dough using a spatula.

five: Remove the other half of the dough from the freezer and remove top wax paper. Cut dough into strips about ½ an in thick, using your same pizza cutter or sharp knife. Lay the strips diagonally, about ¾ of an in apart, across the jam-covered rectangle, first going in one direction and then in the other so that you have a lattice-work of dough across the top of the jam. Trim the ends off the lattice so it fits the base rectangle – again, be sure any extra dough gets saved. Slip a cutting board or baking sheet under the large rectangle of cookie and return to the freezer for several minutes to aid in further cutting.

six: Remove rectangle from the freezer when it seems stiff and cut into squares of desired size. Transfer to lightly greased baking sheet with spatula. These cookies do expand slightly, so be sure you give them enough room. Bake for about 15 min or until lightly browned.

seven: Repeat steps three through six until dough is no more.

eight: Before serving, place cookies on wax paper and dust with powdered sugar.

Remember, the freezer is your friend with these cookies. You don’t want the dough to be too cold when you roll it out – otherwise it will take forever and you’ll be sweating by the time you’ve got it – but once it’s rolled out, it can quickly become too warm to work with. The strips won’t maintain their integrity when you try to peel them off of the wax paper, and the cookies will be impossible to transfer cleanly from wax paper to baking sheet. So don’t be afraid to stick things in the freeze as soon as they start giving you trouble. It doesn’t take long for them to calm down in there and get ready to behave.

White Chocolate Almond Biscotti

I like biscotti because they tend not to be too sweet. Even when you add a little white chocolate.


White Chocolate Almond Biscotti

2 ¼ c all-purpose white flour

1 tsp baking powder

½ tsp salt

3 large eggs

1 c sugar

½ tsp vanilla extract

1 tsp almond extract

1 cup sliced almonds

¾ cup white chocolate (chips)

one: Preheat oven to 325. Lightly grease your baking sheet(s) and set aside.

two: In a mixing bowl, combine flour, baking powder and salt. In another (larger) mixing bowl, beat eggs, sugar, vanilla and almond extract until thick and pale. (About 3 min with an electric mixer on high.)

three: With a wooden spoon, stir the dry ingredients into the wet, followed by the almonds. (The dough will be soft and sticky.)

four: With two rubber spatulas, form the dough into two or three 10-in-long logs on the prepared baking sheet. (The do

ugh doesn’t expand much when baking, so consider how long you want your biscotti to be and that should dictate how many logs you want. That is - how wide you want the logs to be and thus how many you can make at about 10 in long.) They should be about an inch thick. Smooth the logs with a spatula or moistened hands.

five: Bake for 30 min or until the logs are lightly browned and spring back when pressed in the center. Lightly. Transfer logs to a cutting board and slice crosswise into ½-in-thick-slices. Stand the slices upright on the backing sheet about ½ inch apart and return to the oven for another 10 to 15 min. Or until they are lightly colored and crisp. Transfer to a rack to cool.

six: Melt white chocolate carefully – i.e. in a double boiler. I just put a smaller pot in a larger pot filled with a couple inches of

simmering water. Stirring constantly. You can also melt the chocolate in the microwave, if you have one of those, as long as you do it in short installments so you don’t burn it by accident. Stirring in between.

seven: Using a small spatula, spread white chocolate on bottom side of cooled biscotti. Place – top or chocolate side down – on wax paper to cool. Once the chocolate has hardened, remove from wax paper and enjoy!

Especially with coffee.


Winter Slaw: Cabbage & Grapefruit


It's easy to get bogged down with starch in the winter. The holidays are all about stuffing and potatoes - mashed, baked, candied, au gratin - and meat. Which isn't a starch but is often a similar color. Not to mention all of the cheese - cheese plates, on crackers, in balls, mixed into the stuffing and potatoes and meat...tis the season of beige food. It makes sense, of course. If we were actually eating with the seasons, it would be nothing but root vegetables and meats, and preserved things, like cheese. Very few fresh veggies and fruits - mostly fresh from a can or a jar. So it's nice to have some interesting salad options to brighten up our plates. Cabbage - which gets a bad rap, I know - is much hardier than lettuce and thus makes a good cold-weather raw option.

Fresh cabbage has a nice peppery bite that can stand up to the bright citrus of grapefruit, and hot peppers and toasted cumin seed add warmth to this refreshing mid-winter, xmas-colored slaw.


Cabbage-Grapefruit-Cumin Slaw

1 1/2 lb green cabbage (1 lg head), thinly sliced

1 - 2 grapefruit, peeled & "diced"*

5 - 10 red orchid peppers (or other red chili or even green chilis)**, halved the long way, seeds removed & thinly sliced

1/2 tsp toasted cumin seed***

1 tbsp Mirin (rice cooking wine)

1/2 tbsp brown sugar, packed

1/4 tsp salt

3 tbsp olive oil

one: Whisk cumin seed, Mirin, brown sugar, olive oil, salt and pepper to taste in the bottom of a large (serving) bowl.

two: Toss cabbage, grapefruit and peppers in dressing. Let sit for 1 hr.

three: Serve. (about 6)

*Once you've peeled the grapefruit, cut it in half top-to-bottom. Then slice each half into about 1/2 in. slices cross-ways. You can then pull apart the slices into neat, bite-sized segments.

**If you can't find the bonnet chilis - which I happen to get at my local farmer's market - you may of course use any chili that you can find. Just beware of how spicy the chili you've chosen is, and how spicy-tolerant anyone you might try to feed this to is. Adjust pepper amount and the size of your slice accordingly.

***Heat a frying pan over medium heat until hot. Shake tsp of cumin seed over the surface of the pan and toast until fragrant - shaking the pan gently once or twice. This shouldn't take much more than a minute.

Sunday, September 26, 2010

Carrot Relish


Now that money's tighter, and I'm living more on my own again, that is not that I wasn't living alone before but I was sharing more meals, I'm on a kick to use everything up in the fridge before:

a) it goes bad and
b) I go shopping again.

I always have carrots around because they last forever and they make a good snack when I'm frantic running
out the door and don't want to eat another goddamn cracker, but aside from that I don't really put them in much. They go in tomato sauces sometimes or on sandwiches maybe, but I don't like them in salads unless they're grated and I'm too lazy to grate things on a serving to serving basis. I hate cleaning the grater; I always cut myself. But the more carrots get grated at once, the more meals the grating is spread out over, the greater the cost:benefit.

Carrot Relish
(serves 2-3)

2 carrots, grated
1 clove garlic, minced
1 jalapeno (or several random chilies) or to taste, minced*
Juice of 1/2 a lime
Salt to taste

one: Mix carrot, garlic and jalapeno in a bowl.

two: Add lime juice and salt. Taste and adjust.

three: Serve.

Particularly awesome on a burrito in place of salsa when you accidentally buy salsa that isn't spicy enough. Also good on humus sandwiches and def with any sort of peanut anything, including chicken or even red meat!

*note about the chilies: I like things uber spicy. It can be a problem for other people. In my case, I chopped up the chilies whole (I used about three small spicy red and yellows I got at our neighborhood farmer's market) seeds and all, but if you're not that into it, you could consider removing the seeds. Then you get some of the spice from the pepper's flesh, but it won't be as painful.

Monday, September 20, 2010

Receipts.1


3 limes
1 bunch cilantro
1 red onion
1 white onion
1 bag spinach
1 bottle white wine (Las Brisas - a white from the Rueda region of Spain. You see the $$)
1 bottle buttermilk


I often stand there in line at the grocery story wondering what my groceries say about me. Making snap judgements about the guy behind me with the three packages of ground beef, corn chips, chocolate milk, case of red Gatorade and bag of Gala apples.
Meatloaf, perhaps?
So I thought I would just put it out there. I think it's especially interesting now that I live in a neighborhood - um, maybe city - that doesn't really put much stock in full-on grocery stores, thus I have been doing a lot of shopping for a little of things.

In this case my friends just gave me the gift of seven homegrown California avocados. Guacamole? Cold soup? Etc. Etc.

Friday, September 10, 2010

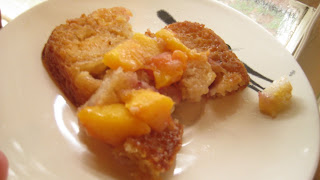
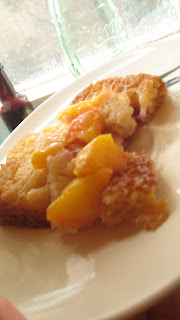
Peach Cobbler: Look No Cans


This is my take on the easy peach cobbler recipe that's all over the internet. I know it's a little late in the season for peaches in many places, but I just visited the local farmer's market in my new neighborhood and came home with a mound of them. I wouldn't normally go here, but I have a friend who hates to bake and has adopted this recipe as her one and only. Now that we don't live in the same town, I find I miss it, so I'm making it my own. I suppose it's a great recipe whatever way you slice it, but most of the versions I've found call for self-rising flour and canned peaches, two things that never darken my pantry door.

Easy Peach Cobbler

1/2 c. unsalted butter
1 c. flour
1 1/2 tsp. baking powder
1/2 tsp salt
1/2 tsp (loose) freshly ground nutmeg
1 c. sugar
1 c. milk
16 oz. (about four) peaches, pealed and sliced

one: Melt butter in the bottom of an 8x10 baking pan.

two: Mix dry ingredients thoroughly with a fork. Add sugar and mix. Add milk and stir until smooth.

three: Make sure butter is evenly distributed over the bottom of the pan - i.e. it's on a flat surface - and poor batter over butter without mixing. Lay fruit slices over the top, again no need to mix.

four: Bake at 375 for 20-30 minutes or until the edges are a nice golden brown. Let cool for a cool 15 and enjoy.

I'll see if I can come up with a nice bourbon vanilla ice cream recipe to go with this one.

There's a Maggot in My Flour


That is, we live in the south.
That is, life must eat and goddamn but don't we have a lot of life down here.
That is, have you seen Suspiria?
That is, it's not poverty it's a Dario Argento movie.
That is, my friend stopped by the other day and brought my attention to something I never thought worth a second glance. It was so necessary and it seemed so intuitive.
Here's the story:
About two years ago I lived in this lovely little shack back in the BR with a very fabulous, if a little cook-lite, friend. Let me set the scene. When my friend rented the place for us - I was out of the country - our landlady mentioned that people 'keep telling me to put some work into these places, really renovate and up the rent, but I don't want to do that. I want to be able to provide cheap housing for students." Sweet isn't she? Very generous. Your average slum lord. Upon moving in, one of the first things I discovered was that when the oven was turned on, the scent of roasting shit permeated the entire house. Turns out.....well actually I don't think what I found under that oven need be described, but let me just say I baked nothing for the rest of that year. Not one thing.
So there I am, in our tiny, hobbled kitchen sauteing bok choi for my peanut noodles when something hits me on the head and bounces, landing on the stove about an inch to the left of my frying pan. Huh, I think and bend over to see.
To see a big, fat, white, writhing worm thing, Like a maggot. About half-an-inch long and thisthisthis close to having fallen in my food. What if I had stepped away for a moment and it had fallen in the pan? I wouldn't have even known.
And so I look up - really look - and there they are. All of these blanched streaks squirming around on the top of the walls. On the ceiling. And little brown, worm-shaped cocoons stuck to the white paint. I couldn't help it. I screamed.
And then I got mad. What the fuck, I thought. We're vegetarian for god's sake. It's not like there's a new shipment of meat stored up in our attic rotting away.
Is there?
No, of course there wasn't. It didn't take long to figure out where the wormies were coming from - much less time, in fact, than it took me to get up on a chair and wipe my ceiling down with bleach. They were, you guessed it, coming from the flour. All of our dried goods, which we had up until that point been keeping in our open-air open-face cabinets. No matter the container, no matter how air tight the seal, there were moths and well-fed larvae in all of our pasta, flour and bulk grain.

I threw out everything. And I started keeping my flour in the freezer.

So a week ago, my friend comes over - a fellow baker - and I reach into the freezer to get us some gin.
"You're a genius," she says.
"What?" I say.
"Your flour," she says. "We keep getting bugs in our flour. You've got it in the freezer."
"Oh, yeah," I say. "It helps."
"Pure genius," she says. "You should blog about that," she says.

Ta-da.

Sunday, August 29, 2010

Snob Review: Raising Cane's, Baby


What better way to end days and days of eating off the highway (if I never eat Subway again...) but with Baton Rouge's best home-grown fastfood!

Raising Cane's began as a homework assignment for a business class at LSU. Todd Graves, Cane's founder, apparently got a terrible grade on his chicken finger business plan, but there's no dream quite as strong as the dream of fried chicken. After years of hard work out in the real world, he raised enough capital to get it going and finally opened the first store outside LSU's north gate in 1996. It was off to a bustling, finger-licking beginning, and the business has since expanded beyond our little sleepy BR berg into 13 other states of this our great nation.

One of the best thing about Cane's, I think, is the simplicity of their menu. They really have only 6 items from which to assemble your meal: chicken fingers, french fries, coleslaw, Texas toast, super-secret Cane's sauce and soda. You can order any of these a la carte, or you can go with one of their meals - various numbers of fingers, fries, toast, sauce and a drink or the Cane's sandwich: chicken fingers on a bun. That's it. That's all she wrote.

Brilliant.

Of course, what makes this simplicity pay off is the quality of the (fast)food. There's no denying the fastfood fried-ness of these meals. But everyone needs a little fastfood in their lives, and if you're gonna do it why not do it right. Do it local...or at least not BIG business. Do it yum.

First and foremost, these are some serious chicken fingers. I have to admit, I'm a sucker for chicken fingers. They were the very last meat I ate after I had become vegetarian - I ordered them delivery to my dorm in Boston and snarfed them in the common room, hoping no one would catch me and tell the vegetarian police. These chicken fingers are no McDonald's processed crap. They are clearly chicken - all white meat, flaky like chicken can be, tender and with the right meat:fried ratio. (I.e. more meat less fried. But still very very fried.) Definitely Cane's crowning glory. As they should be. The fries are fries - not particularly potato-y but salty like fastfood fries were meant to be - and while the sauce could use a little more kick in my opinion, it was creamy, saucy, good. Nothing here is pretending to be good for you, and so maintains its high taste level, but everything is quality. KFC should hang its head in shame.

Lastly, just a word about the ambiance. The original store, the one where I purchased these lovely fingers, is a real LSU staple. College kitsch on the walls and tiger print upholstery. Def worth the visit. And you see that guitar on the wall behind me? Enter to win.

Friday, July 9, 2010

the Fuckin Neat-o


Since I've been on the outs with food, we'll kick off this month with a drink.

This one is sunny New York summers with a slug of Texas trouble. Credit where credit is due, this was my mother's stroke of genius. We were mixing our first drinks - in honor of two June birthdays, mine and my mother's Texan friend - when my mom pulled out the jalapeno vodka.

As for the name, well, we asked my mom to do the honors, but she refused, claiming to be bad with names. Physicists are silly. Thus it was left to the children, and so in honor of my imaginary fan club, I present to you:

the Fuckin Neat-o

- 2 parts (oz.s) jalapeno vodka (or other spicy booze)
- 1 part (oz.) cucumber juice (approx. 1/2 cuke)
- Juice of 1 substantial lime wedge
- Strawberries, halved in sugar
- Cracked ice

makes 1 drink

Puree half a cucumber. Place mush in a mesh strainer or perhaps a cheese cloth and strain juice into a bowl. Combine booze and cucumber juice in a martini or rocks glass. Squeeze lime juice over the top, add strawberries and ice, stir and serve!

The strawberries, btw, where prepared beforehand. Halved and mixed with sugar and a dash of Grand Marnier or like liqueur. This brings the strawberry juices out a little, but you could simply use fresh ones if that's what you have on hand. It doesn't take long, however, for the sugar to take effect.

Consider mint.


By the way, genius in the arena of drinks and food is nothing new coming from my mother. Stacie Nunes is our resident gourmand up in New Paltz, NY. A physicist at SUNY New Paltz, she's begun catering friends' parties on the side and keeps threatening to start her own blog. Let's hope she makes good on this threat. What can we do to force her hand?

Things are Happening

So I've been on a vacation of sorts, but I'm back!

I think.

Depending on my travels.

Partly, I haven't been doing much in the way of cooking lately because it's just too damn hot. I lose my appetite at the beginning of the summer down here while my body takes some time to calibrate. It's much more difficult to write interesting things about food when you're don't find food interesting. However, there are some things to be said about that - about the things that have sustained me in my uncharacteristic period of eating to live.

Rather than living to eat. Yadda yadda.

Partly II, I've been away, and I will be away again starting tomorrow. The summer is the time to get out of the dirty south and head north, so it was New York and now Oregon and then a long drive back through California and across the desert. I don't expect to be doing much in the way of cooking on this trip, but I do expect to find some wonderful - in Portland - and wonderfully terrible - see: I-10 - food on my travels. Which means more Snob Reviews.

Last partly, pictures might be slow coming. As they have been. I'm adverse to posting without pics cuz it seems too dull, but I don't know that I'll get my camera set up on the tiny computer for the trip. You'll have to wait and see.

(A note on snobbing. It came to my attention, while I was home in lovely up-state New York, that my snobetarian lifestyle transcends the bounds of good eating. I discovered this when I tried to make the argument that people from New York were generally neither more upper-class nor more uppity than people from the mid-west. I then proceeded to snob on every topic that came up for the rest of the day. Possibly week. So. What does this mean? Well, what it means to me is that I need to really embrace the snobbing. Writing teachers are always telling you to figure out what it is you do that makes your voice yours and to work it. Apparently, what I do is snob. It doesn't come from a mean place, or a place of judgement, mind you. Not usually. Don't be offended. Expect more snobbing.)

Tuesday, June 8, 2010

Wine Snob 101.1


It's the inaugural post from the inaugural BR wine club! Look for monthly notes from your friendly southern Wine Snobs.

Each month, maybe more, we'll pick a theme, pack over some bottles and compare. In honor of the nearing summer solstice and the sudden Louisiana summer heat wave, it's Riesling Riesling Riesling!


Cupcake Riesling $14.99 ish
(check/check -)

Columbia Valley 2009 (13.5%)

nose: green apple, orange blossom, honeysuckle, peach, stemmy straw

mouth: citrus, grapefruit, sour apple, gooseberry, lemon?

This has a strong attack and a mellow fruity aftertaste. It was one of the drier ones we tasted with more of an in-your-face sauvignon blanc tartness than I expect from a Riesling. Perhaps a little imbalanced. Sort of like that guy who talks too much cuz he's insecure. He'll flirt his face off at a party, make you laugh, dance on the table, but don't be fooled. You're gonna have to make all the first moves.


Chateau Ste. Michele “Dry Riesling” $8.99 ish
(check/check -)

Columbia Valley 2008 (13%)

nose: banana, white cherry, pine, round and warm

mouth: eucalyptus, pepper, apricot, vanilla on the finish

A bigger, softer wine with solid peachy Riesling fruit set off by a peppery bite. Like a scoop of sherbert with pop-rocks on top.


Trimbach $22 ish
(check +)

Alsace 2007 (12.5%)

nose: moldy (cheese), wet wool, peach, apricot, faint blossom

mouth: lavender, soy sauce, geranium, orange blossom

This one is smooth smooth smooth with a bit of bite at the end. An acerbic wit, a sardonic soft-talker. You won't realize what she was really saying until you've already turned away. A Redstar Bar hipster. She only listens to early 80s cure. And you just can't get enough.


Pacific Rim $10.39 ish
(check
)
California I-just-totally-spaced-on-the-year-here? (12.5%)

nose: orange zest, soap, wet cardboard, computer paper in your mouth, melon, peach, kerosene!

mouth: barnyard straw, dried apricot, bing cherries, cooked green beans

Totally surprised me based on the non-standard bottle, the cheesy looking label. A really interesting balance of fruit and other. Not overbearing. Not so cutesy. You go back. You go back.

"It's the velveteen rabbit! It's Blonde Redhead!"


Schloss Vollards Qualitätiswein $16.99 ish
(check -)

Rheingau (10.5%)

nose: honey, grass stemmy, perfume-y floral

mouth: honey, fake grape, peach nectar, pepper?

“It's like eating a popsicle on a dock on a summer evening.”


Clean Slate $11.99 ish
(check -)

Mosel-Saar-Ruwer 2008 (10.5%)

nose: green apple, yellow raisin, horse, campfire, menthol, slate?

nose: green apple jolly rancher, (sweet), grapefruit on the end

This wine tastes like "colors."


Riesling Qualitätiswein $?
(check -)

Mosel-Saar-Ruwer 2007 (9.5%)

nose: butterscotch.

mouth: vanilla. One note. We got bored.

Tastes like grandma, plastic couch covers and perfume. Tastes like the night before your quinceÑera.
(And that's all she wrote. Are we drunk?)


Selbach-Oster Kabinett $17.99
(check +)

Mosel-Saar-Ruwer 2008 (9%)

nose: gasoline, wet dog, burnt sugar, pickled okra, clay, anise, lavender, peach?

mouth: honey, grapefruit, pineapple

This one seemed the most characteristically Riesling, and had the roundest, most complex flavor. A well-fed, well-travled gentleman with a very nice pocket watch who likes to hand out cigars.

Monday, May 31, 2010

Spectacular Sauce

Tomato sauce could be called boring.
Or it could be called simple.

2 sm or 1 lg onion, chopped

2 shallots, chopped

5 + cloves garlic, chopped

Balsamic vinegar

3 dried chilies, crumbled

1 tsp fennel seed

1/2 oz.can tomatoes, chopped with juice

Bragg's


  1. Saute onions, shallot and garlic in olive oil over medium heat until translucent. Add balsamic, stir for a few seconds and add chiles and fennel seed. Saute until chili skins darken.

  2. Add tomatoes. Bring to a nice simmer and turn the heat down to low. Add Bragg's to taste (maybe about a tsp, but start less and work up). Cook, partially covered, until sauce thickens. Perhaps 20 min.

  3. Done and done.


One thing about tomato sauce is that you really need to add a little sugar to it to cut the acid in the tomatoes, but I don't like sweet tomato sauces and it can be hard to hit the right balance. In this case, the balsamic adds a little sweetness and a nice round flavor. Sugar tastes just sweet. Flat sweet. This is a nice interesting sweet. I like the added flavor of the shallots as well. It complicates the onions. Onions should be complicated to compensate for the simplicity of the sauce overall.

Monday, May 17, 2010

Pumpkin Gnocchi


I heart gnocchi, and I've always been interested in trying different varieties. I've had them with basil in them, and that was good, so here's a pumpkin version. These is probably more of a fall dish, but I happen to have some pumpkin that I roasted and froze last fall. It tastes good to mix up the seasons when you can.


1 lb. pumpkin

1 lb. red potatoes

1 tsp salt

1 1/4 + flour

  1. Preheat oven to 400 and place potato(es) and pumpkin on baking sheet. Bake until soft, about 45 min. (I pre-baked my pumpkin and stuck it in the freezer. I can pretty much only find fresh pumpkins for sale during pumpkin season, so I try to stock up.)

  2. Peel potatoes and pumpkin while still hot. Let cool for several min and then push through a food mill or ricer. Neither? Me neither. I put mine through the food processor.

  3. Sprinkle with 1 1/4 c. flour and mix with your hands until you have a smooth dough. If sticky, add more flour, a little at a time. Don't knead or over-work. (I had to add significantly more flour than it seemed one would add if using potatoes alone. The pumpkin is moister, and requires more flour.)

  4. Take 1/4 of the dough and role into a snake about 1/2 in. in diameter. Cut into pieces about 3/4 in. wide. Role into balls or press with the tines of a fork and place on a baking sheet sprinkled with flour. Repeat until dough is all transformed into balls.

  5. Bring a large pot of water to boil. Drop gnocchi into the water about 10-20 at a time, depending on the size of your pot. When they rise to the surface, give em a count of twenty and they're done! Scoop out and place aside. Repeat until done. (sometimes they stick to the bottom, so you may want to give a quick stir if they seem to be down there for a long time.)

At this point, they're ready to sauce and eat, however, you can fancy it up by baking them in butter and cheese, or pan frying them. I choose the later. Just heat about a tbsp or 2 (enough to coat bottom) of olive oil in a frying pan and place gnocchi in a single layer over the bottom of the pan. Fry until they have begun to brown on the bottom, sauce and serve!


Sauce soon to follow . . .